Getting Started With the Discussion Tool
This guide serves as an introduction to using the Discussion tool. Using discussions is a great way to provide asynchronous conversation between students and to assess their understanding of course material. However, this tool can be confusing with its verbiage and how it functions. This document will explain what each term means, and how to organize the discussion area. It also provides a step-by-step guide for how to get started using discussions.
Note: Content posted by students in a discussion thread is viewable by all other students enrolled in that course. When creating a topic you will have the option to let students hide their name from other learners.
- Understanding discussion Forums, Topics, Threads, and Responses
- Using discussions: Step-by-step
- Grading discussion responses
If you’d like to learn how to set up Group Discussions, click here for those instructions.
Updated Fall 2023
Click here for a printable version
Discussion Forums, Topics, Threads, and Responses
Some students may find engaging with in-class discussions to be difficult or intimidating. Consider creating anonymous Brightspace Discussions to give students an opportunity to contribute comfortably.
The discussion tool is set up with Forums, Topics, and Threads.
- Discussion Forum – This is a heading or category that discussion topics will live inside. Students can’t do anything in an empty forum. It must have topics inside of it for discussion to take place.
- Discussion Topic – The topic is where you state what is to be discussed. Students will then reply by starting a thread. You must designate what forum your topic is to reside in.
- Discussion Thread – When a student posts their response to a topic, it will start a thread. This allows the instructor and other students to react to what they have said.
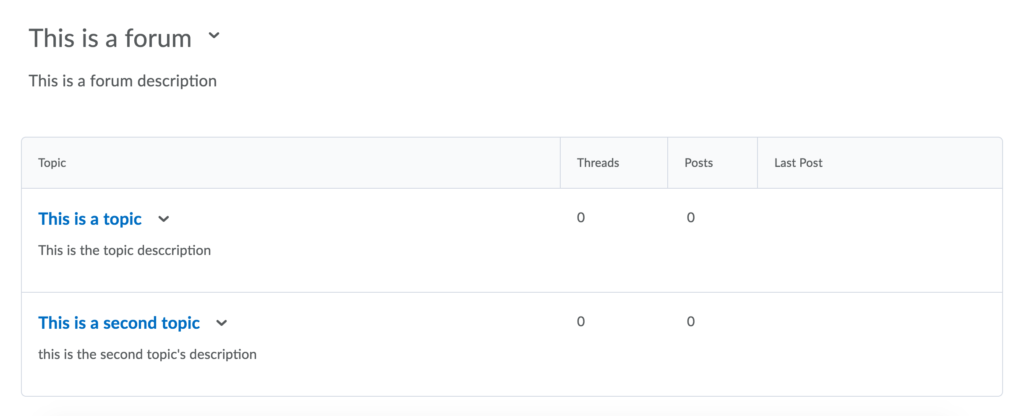
Here are two examples of how Forums and Topics are displayed in Brightspace.
Example One: this shows where a forum, topic, and description will show up
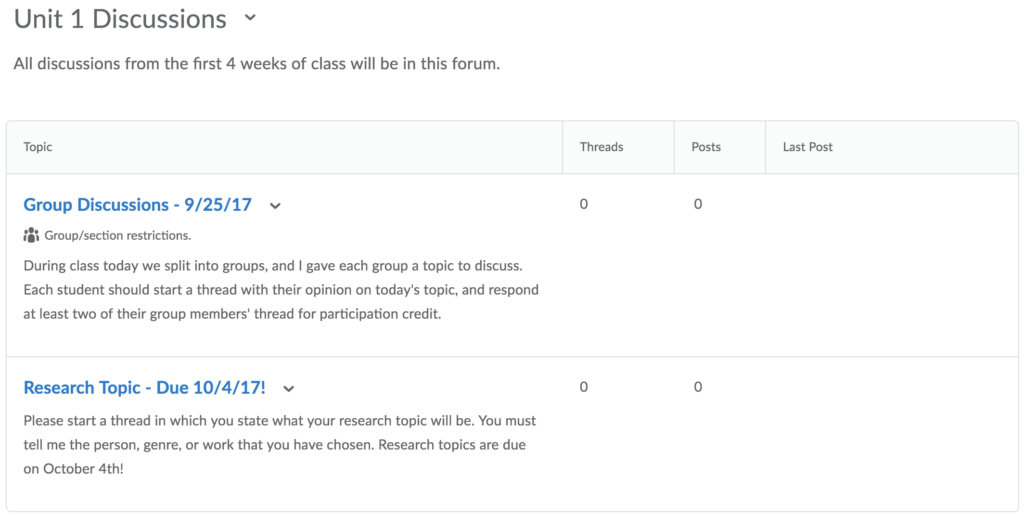
Example 2: this shows a real case use of a discussion forum
Using Discussions: Step by Step
- Locate the Discussions tool under the Activities and Assessments tab in your Brightspace course
- Create a Forum by clicking New and Create Forum
- Create Topics to reside within that forum (link to detailed guide on creating topics)
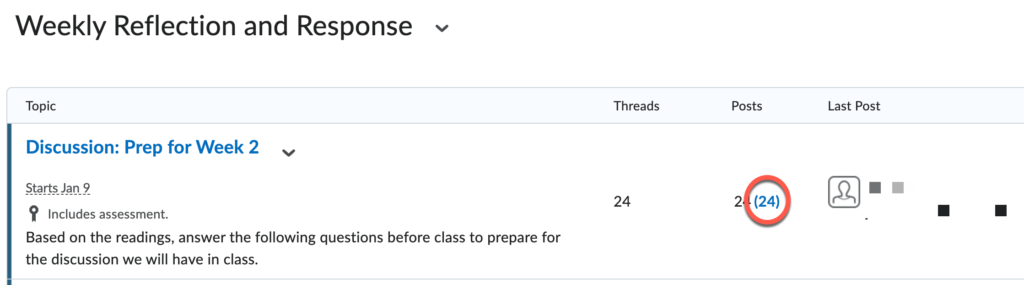
- As students respond to the topic, you can view their responses by clicking on the hyperlinked number in the “posts” column
- If desired, you can grade responses and link it to the grade book. You would need to set this up ahead of time when you create your topic (Step 3).
Grade a Discussion Response
First you must set up your topic to be assessed. Use this guide to learn how to set up a topic and add assessment. Once you have added this option to the topic you are able to grade a response.
- Navigate to your discussion topic under the Activities and Assessments tab and click on the hyperlinked number in the “posts” column to view responses (see graphic above in step 4)
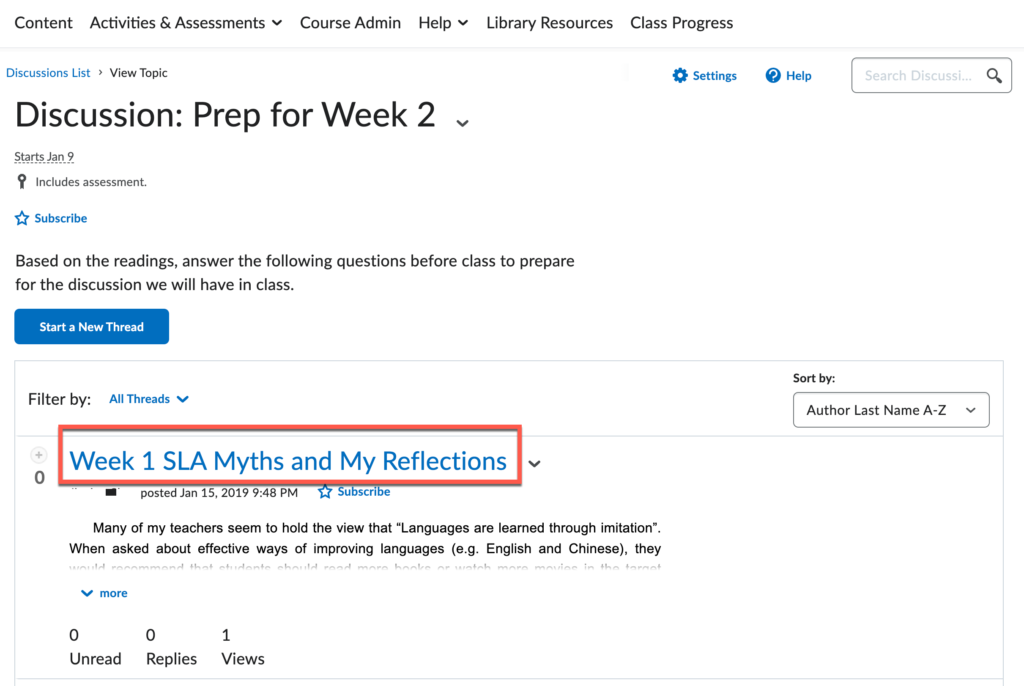
- Click directly on the response link to view the student’s response
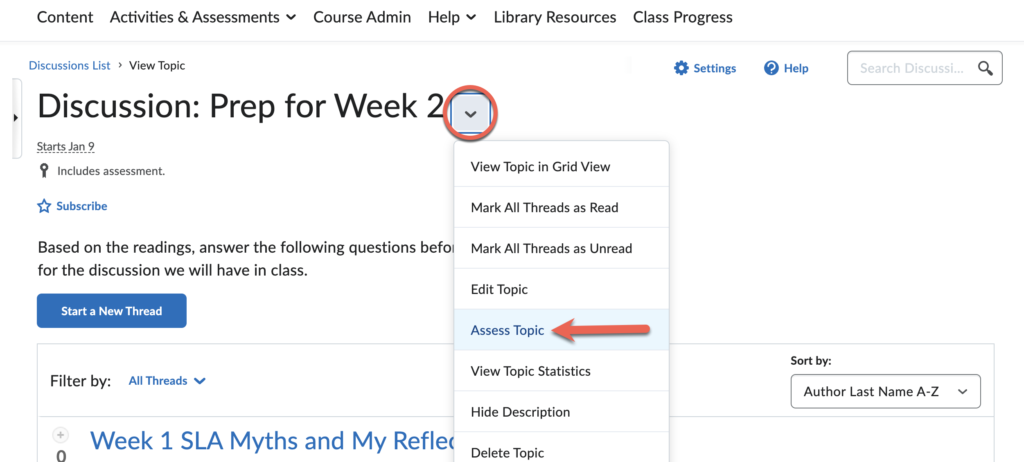
- After viewing their response, click on the drop-down menu and select Assess Topic
- Enter the point value for this student.
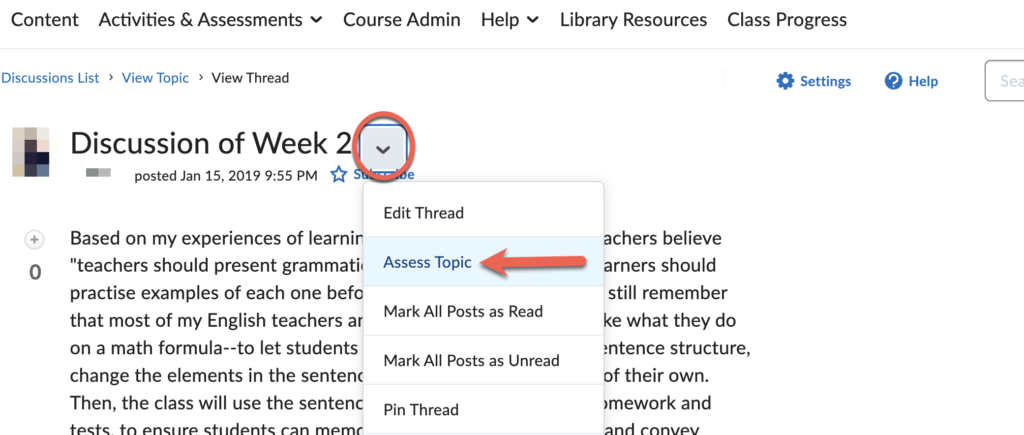
Tip: If you want to assess all students at once, you can do that by selecting Assess Topic on the topic page, and not on an individual student’s response. This is helpful if you are only grading on participation and not content.