
Setting up the Grade Book with the Setup Wizard
It’s a good idea to use Brightspace’s gradebook to help organize your grades. If set up correctly, it will calculate your grades for you. It’s also a secure way to provide grade information to your students.
The first step to setting up your gradebook, is to go through the seven steps in the gradebook’s Setup Wizard. This guide will explain each step.
Once your settings are in place, you will want to visit the guide for Creating Gradebook Categories and Items.
For personalized help with setting up your gradebook, visit Brightspace Support at the Institute for the Advancement of Higher Education (AdvancED).
Updated Spring 2022
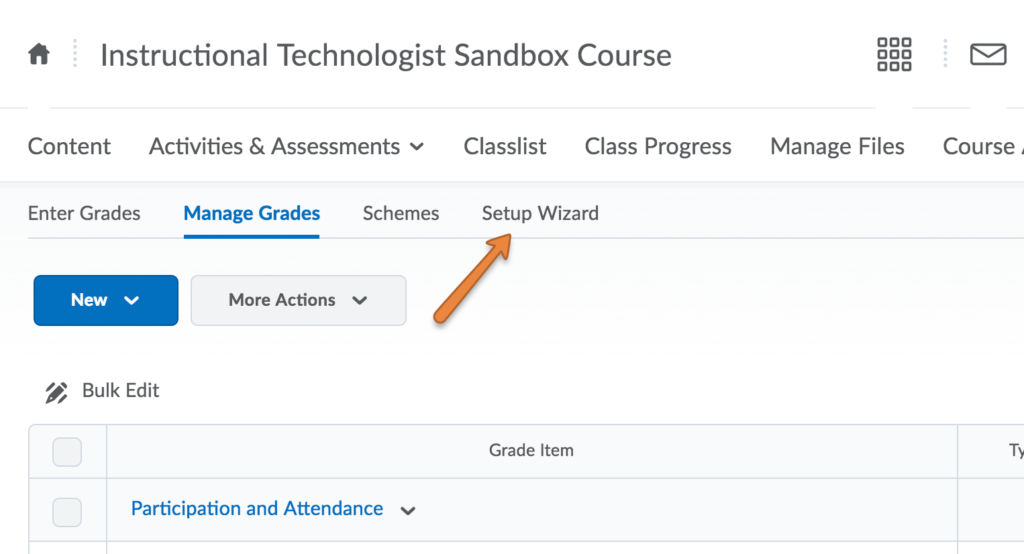
Access the Setup Wizard
To access the Gradebook’s Setup Wizard, click on Course Admin, and then click Grades. Select the Setup Wizard tab.
You will see default settings displayed. Scroll to the bottom of the page and click Start.
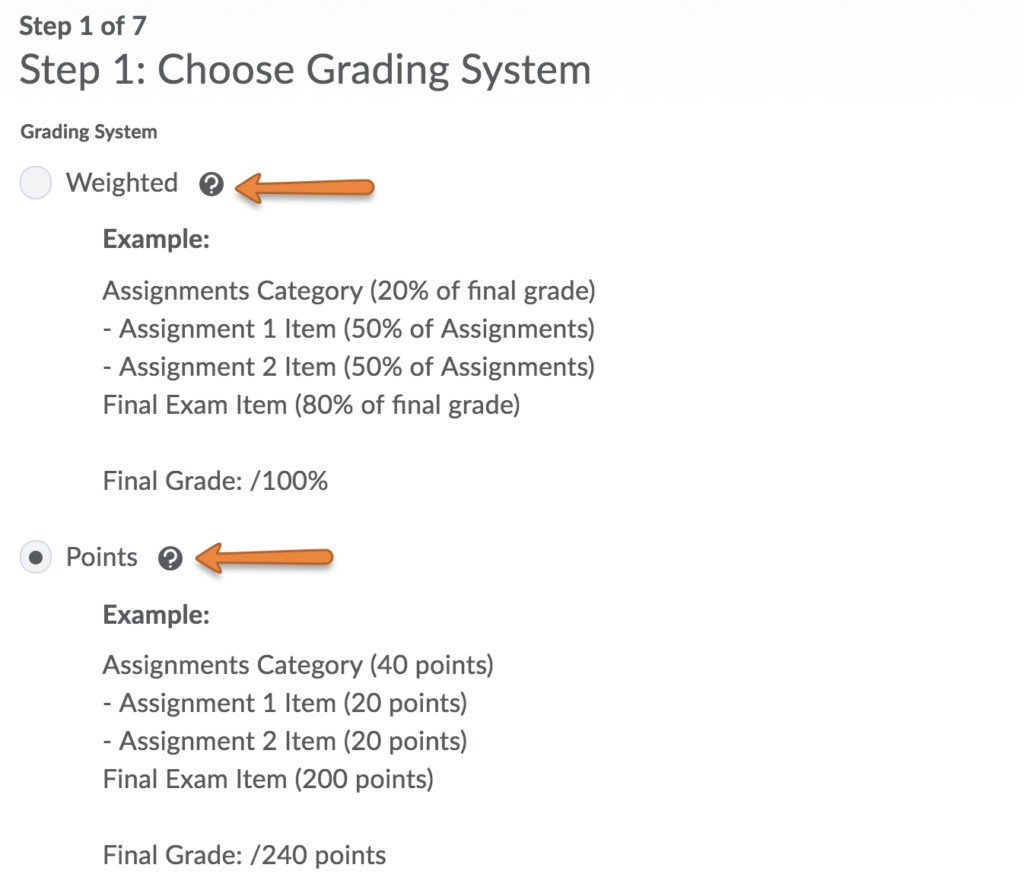
Step One: Choose Grading System
Most instructors will use a Weighted or Points system. Look closely at the examples to see which type of grading system matches your syllabus. Make your selection and click Continue.
If you need to create a custom formula for your grading system, please contact Brightspace Support directly for assistance.
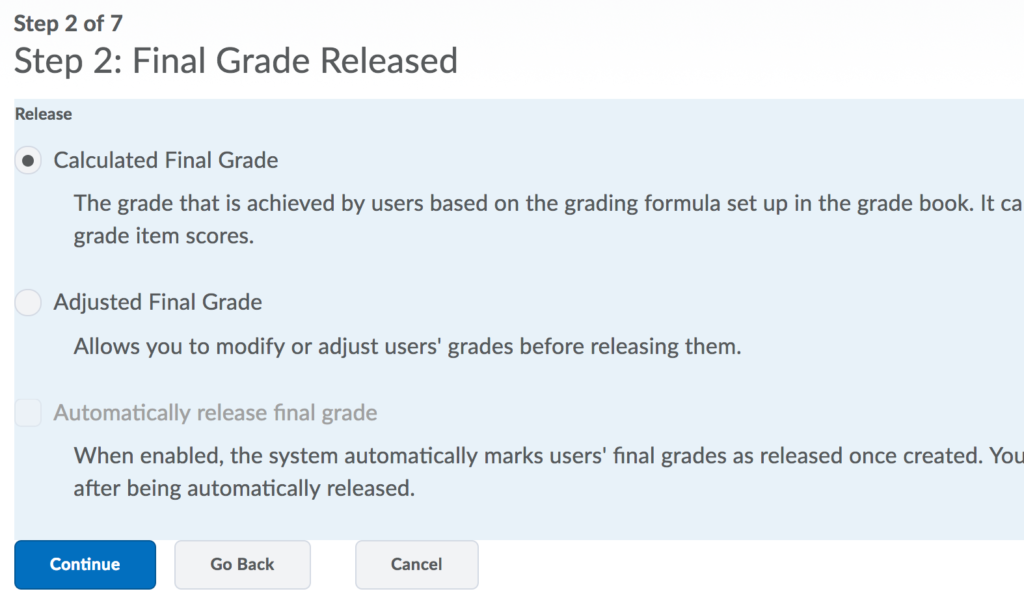
Step Two: Final Grade Released
In most cases, an instructor will choose Calculated Final Grade. This selection will automatically calculate the final grade based on what’s in the gradebook.
An Adjusted Final Grade is a final grade that you must manually enter to override the calculated final grade. Be advised that while this may work well for small courses, it will be a large task for a large course.
Do not check Automatically Release Final Grade.
Step Three: Grade Calculations
On this step, you must decide if ungraded items are dropped from the final grade calculation, or if they are treated as a zero.
You can also determine whether you’d like the final grade to automatically update every time a new grade is added to the gradebook.
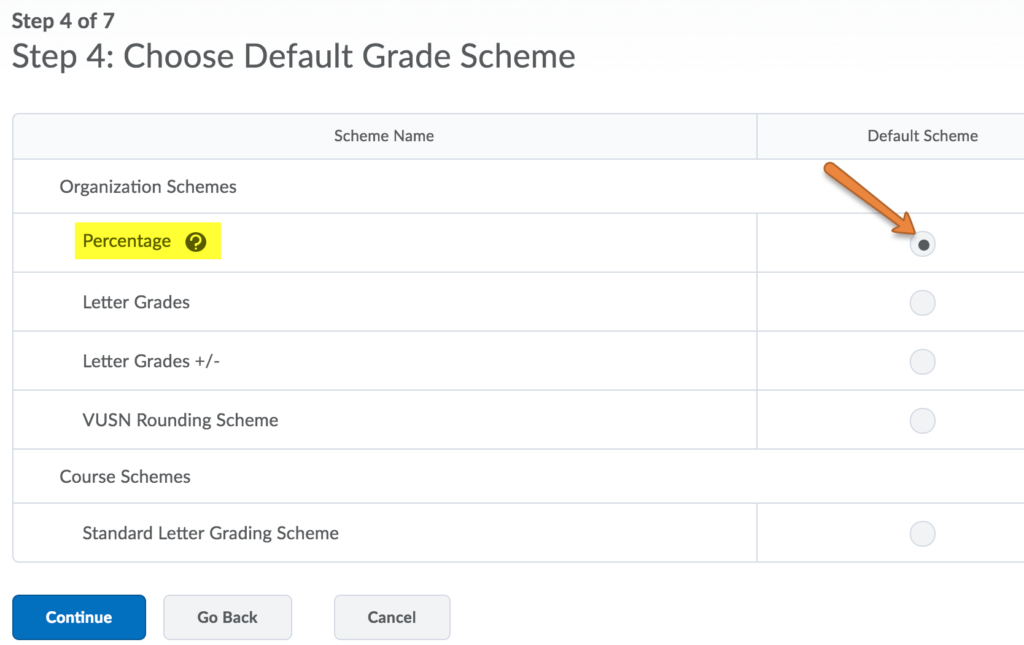
Step Four: Choose Default Grade Scheme
Choose Percentage for your default grade scheme. Click continue to Step Five.
Step Five: Managing View Display Options
Choose the number of decimal places you’d like to view. This is for your gradebook view, and not what the students would see. Typically this would be left at 2 decimal places.
Step Six: Student View Display Options
These options affect what the student will see when viewing their grades.
- Points Grade – Students will see the point value of their score. Ex. 83/100
- Weighted Grade – Students will see their score as a percentage. Ex. 83%
- Grade Scheme Symbol – Students will see a symbol (letter grade) Ex. B- (Note: You must have set up a grade scheme in order for this to work. Contact Brightspace Support for help setting up a letter grade scheme)
- Grade Scheme Color – The student’s grade view will have a shaded background color that varies according to grade. Ex. An A has a green background, an F has a red background.
- Decimals displayed – You may or may not want students to view the decimals used when calculating their grade.
- Characters Displayed – It is a good idea to leave this at 50
- Final Grade Calculation – Check this box for students to view their final grade calculation throughout the semester
Step Seven: Grades Setup Summary
Review the summary of your selections and click Finish. You can re-visit the Setup Wizard at any time to modify your changes.
Once your settings are in place, you will want to visit the guide for Creating Gradebook Categories and Items.