
Creating Groups in Brightspace
Many times, students will work in groups to do a project. Brightspace allows you to set up groups in a variety of ways. You can also set up group discussion boards that are only available to group members. Groups can also submit a single assignment that you can then assign a group grade. This guide will show you how to set up your groups.
Do you want your group to include group discussions or assignments? That is explained in Step 5 of this guide.
Updated August 2023
Set up Groups
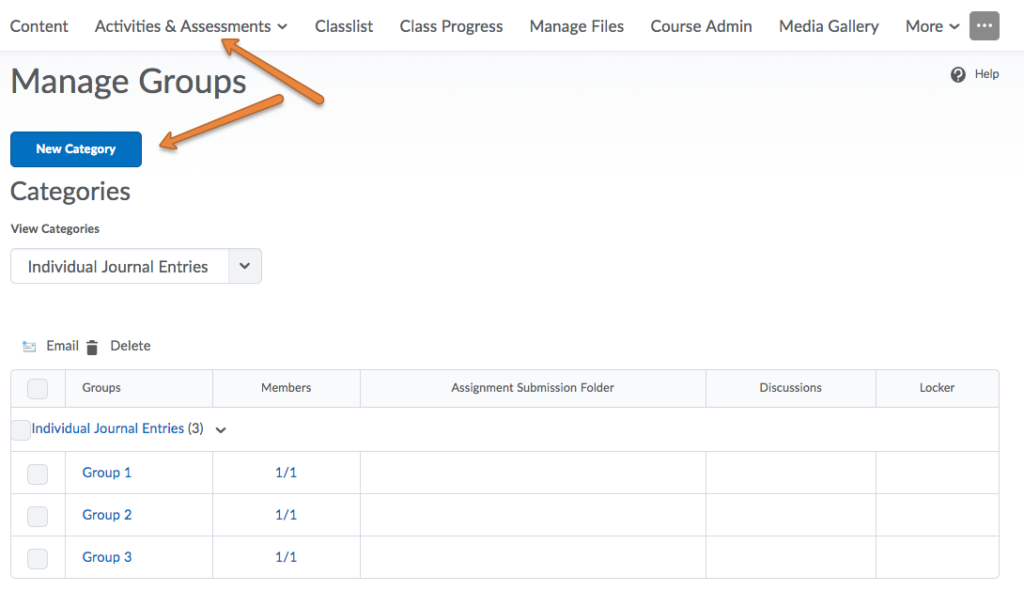
- Go to Activities & Assessment and select Groups. To set up your groups, click on New Category.
- On this screen you will give the group Category a meaningful name.
- Include a Description that will be visible to the students.
- Select which Enrollment Type you would like to use:
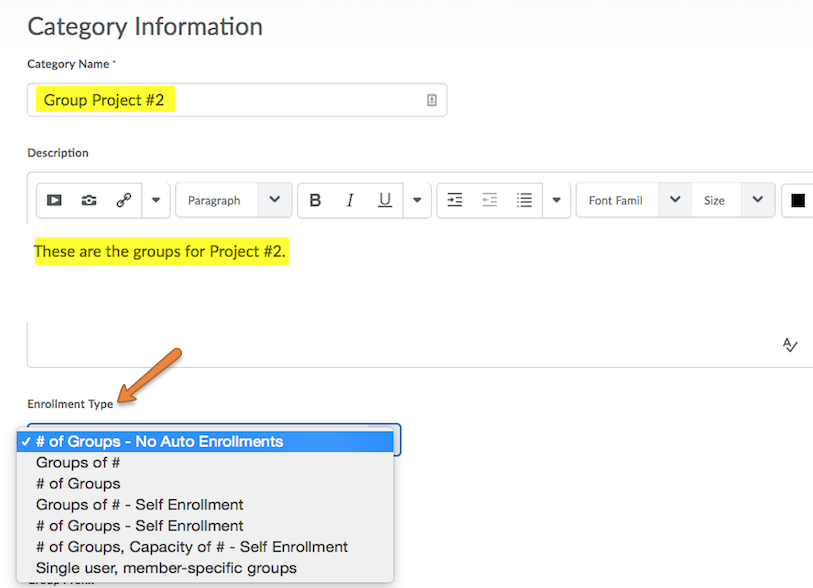
Enrollment types with description:- # of Groups – No Auto Enrollments – set the number of groups, and the instructor will manually assign students
- Groups of # – set the group capacity, i.e. “groups of 4”
- # of Groups – set a group limit, i.e. “7 groups total”
- Groups of # – Self Enrollment – set the group capacity and allow students to self-enroll
- # of Groups, Capacity of # – Self Enrollment – set the group capacity and number of groups, and allow students to self-enroll
- Single user, member-specific groups – set up groups of 1
Depending on which Enrollment Type you chose, you will have fields to fill in regarding number of groups, number of users, and other enrollment-related options.
If you choose the Groups of # or # of Groups enrollment types, you will have three additional options under Advanced Properties.
- Auto-enroll new users – If enabled, this setting will automatically add any new students to a group in this category if they are added to the course later.
- Randomize users in groups – If enabled, this will enroll students in a random order. If this is not enabled, students will be enrolled based on their order in the classlist.
- Make category and group descriptions visible to group members.
- Decide which Additional Options you would like:
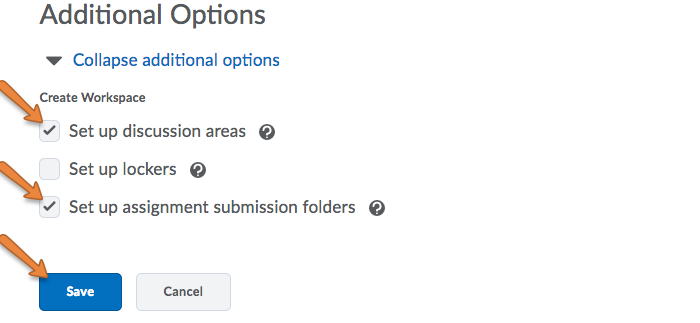
- Set up Discussion areas – This will set up a Discussion Item that only group members can use. The instructor can also view and participate in the discussion. To learn more about Group Discussions click here.
- Set up lockers – We advise against using Lockers for sharing files. Instead use Vanderbilt’s Box system for file sharing and collaboration.
- Set up assignment submission folders – This allows you to immediately create an Assignment that will be associated with these groups. This assignment will allow a group submission. You can also create a group assignment later following these instructions.
- Click Save when you are finished.
If you indicated that you would like to set up a group Discussion or Assignment, you will be presented with screens to set up those items.
Once you are completely finished you will see your groups on the Groups page.