
How do I use CaptureSpace Lite in Kaltura?
Capturespace Lite is part of Kaltura. It is a desktop tool that allows users to record their screen, webcam, and microphone which is then uploaded to their My Media page in Brightspace. The media can then be deployed as needed inside of a course.
Click here for a shareable PDF.
After logging into Brightspace, from the landing page:
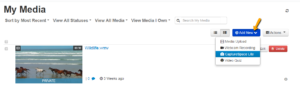
1) Click My Media

2) Click Add New, then select Capturespace Lite
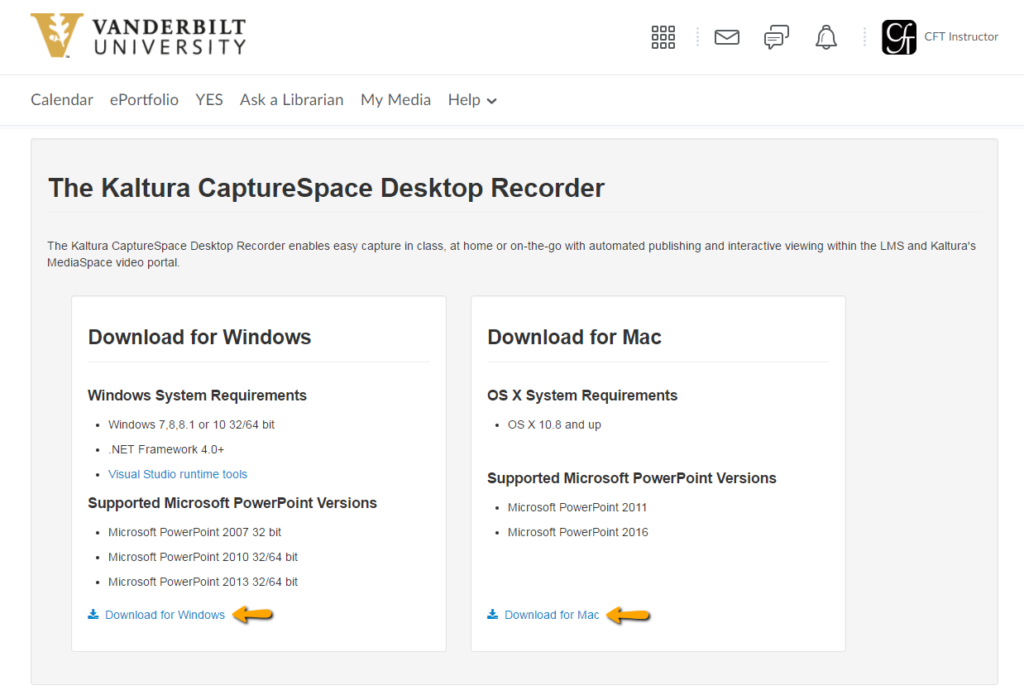
3) Choose your operating system to download CaptureSpace Lite. Once the tool is installed, go back to My Media and choose Add New > Capturespace Lite.
4) After opening CaptureSpace Lite, you are presented with a Dashboard that consists of 4 tabs (Record, Library, Settings, Help).
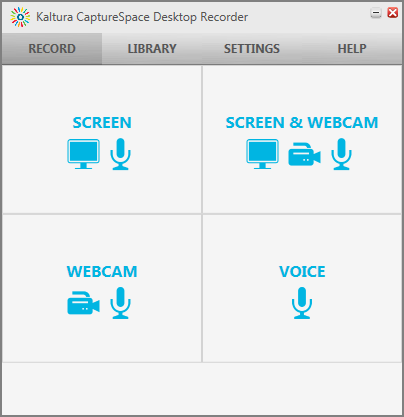
The record tab offers multiple ways to record media:
Screen = record computer screen and voice
Screen & Webcam = record computer screen, webcam, and voice
Webcam = record webcam and voice
Voice = record voice only
5) Click Screen.
6) Select area of screen to capture: Full screen or Select area.
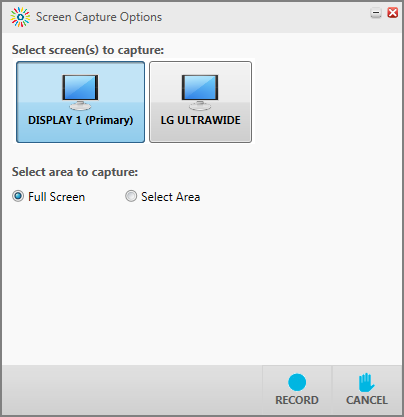
If choosing Full Screen, click the Record button to begin recording.
If choosing Select area, recording will begin after screen area is selected.
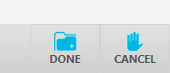
7) To stop recording, click the Done button.
8) Use the editing buttons (Trim, Chop, Title, Credits) to edit the video as needed.
9) After completing any edits, click the Done button.
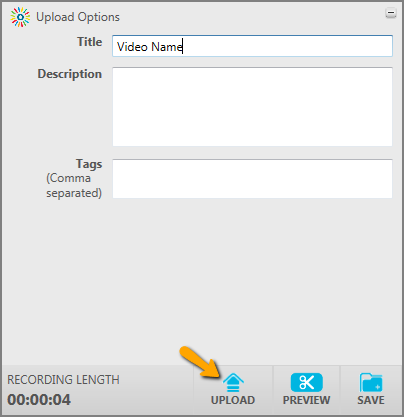
10) Provide a name for the video.
11) Click Upload.
12) Once video is finished uploading, click Close.
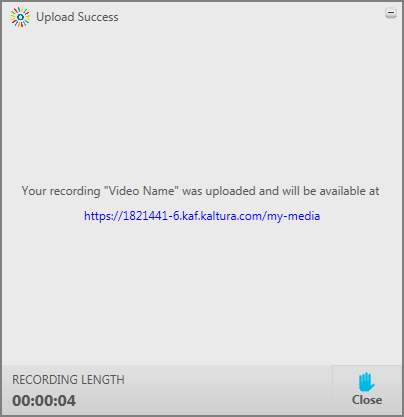
It could take several minutes for the video to appear in the My Media section of your Brightspace account.
Be patient and keep checking My Media until the video appears.
The video is now ready to be added to a course. Go to a course, select Media Gallery from the navbar, then choose Add Media. Select your video from the list and click Publish.